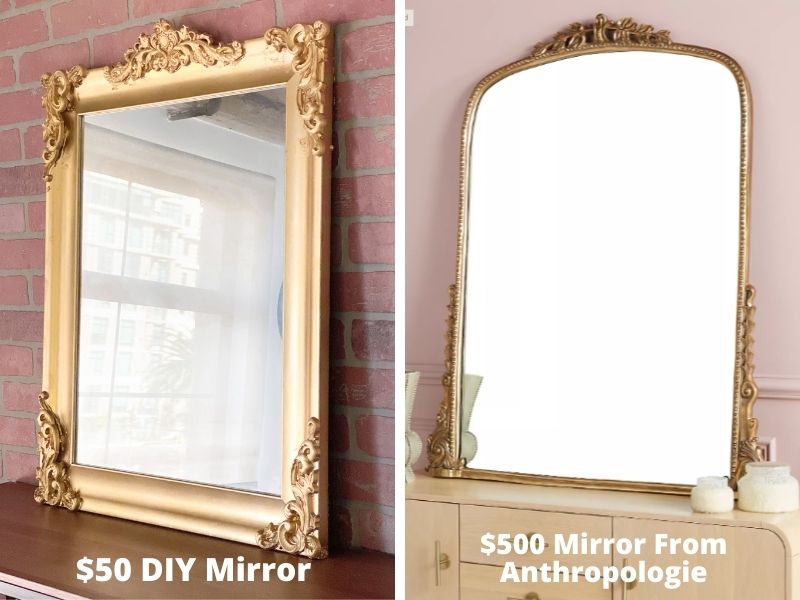
If you love the Anthropologie Gleaming Primrose mirror but you don’t love the price tag, try this super easy DIY for just under $50! (Video Tutorial Included!)


If there was ever a mirror to envy over the last few years, it was (and probably still is) the Gleaming Primrose Mirror from Anthropologie. There’s no denying it’s a gorgeous piece of decor, but the price tag does NOT pass the vibe check! For those of you who aren’t familiar, the 3 foot mirror will set you back about $500, and the 7 foot option will cost you a whopping $1,600! ? Sorry, but that’s gonna be a no from me, dawg.
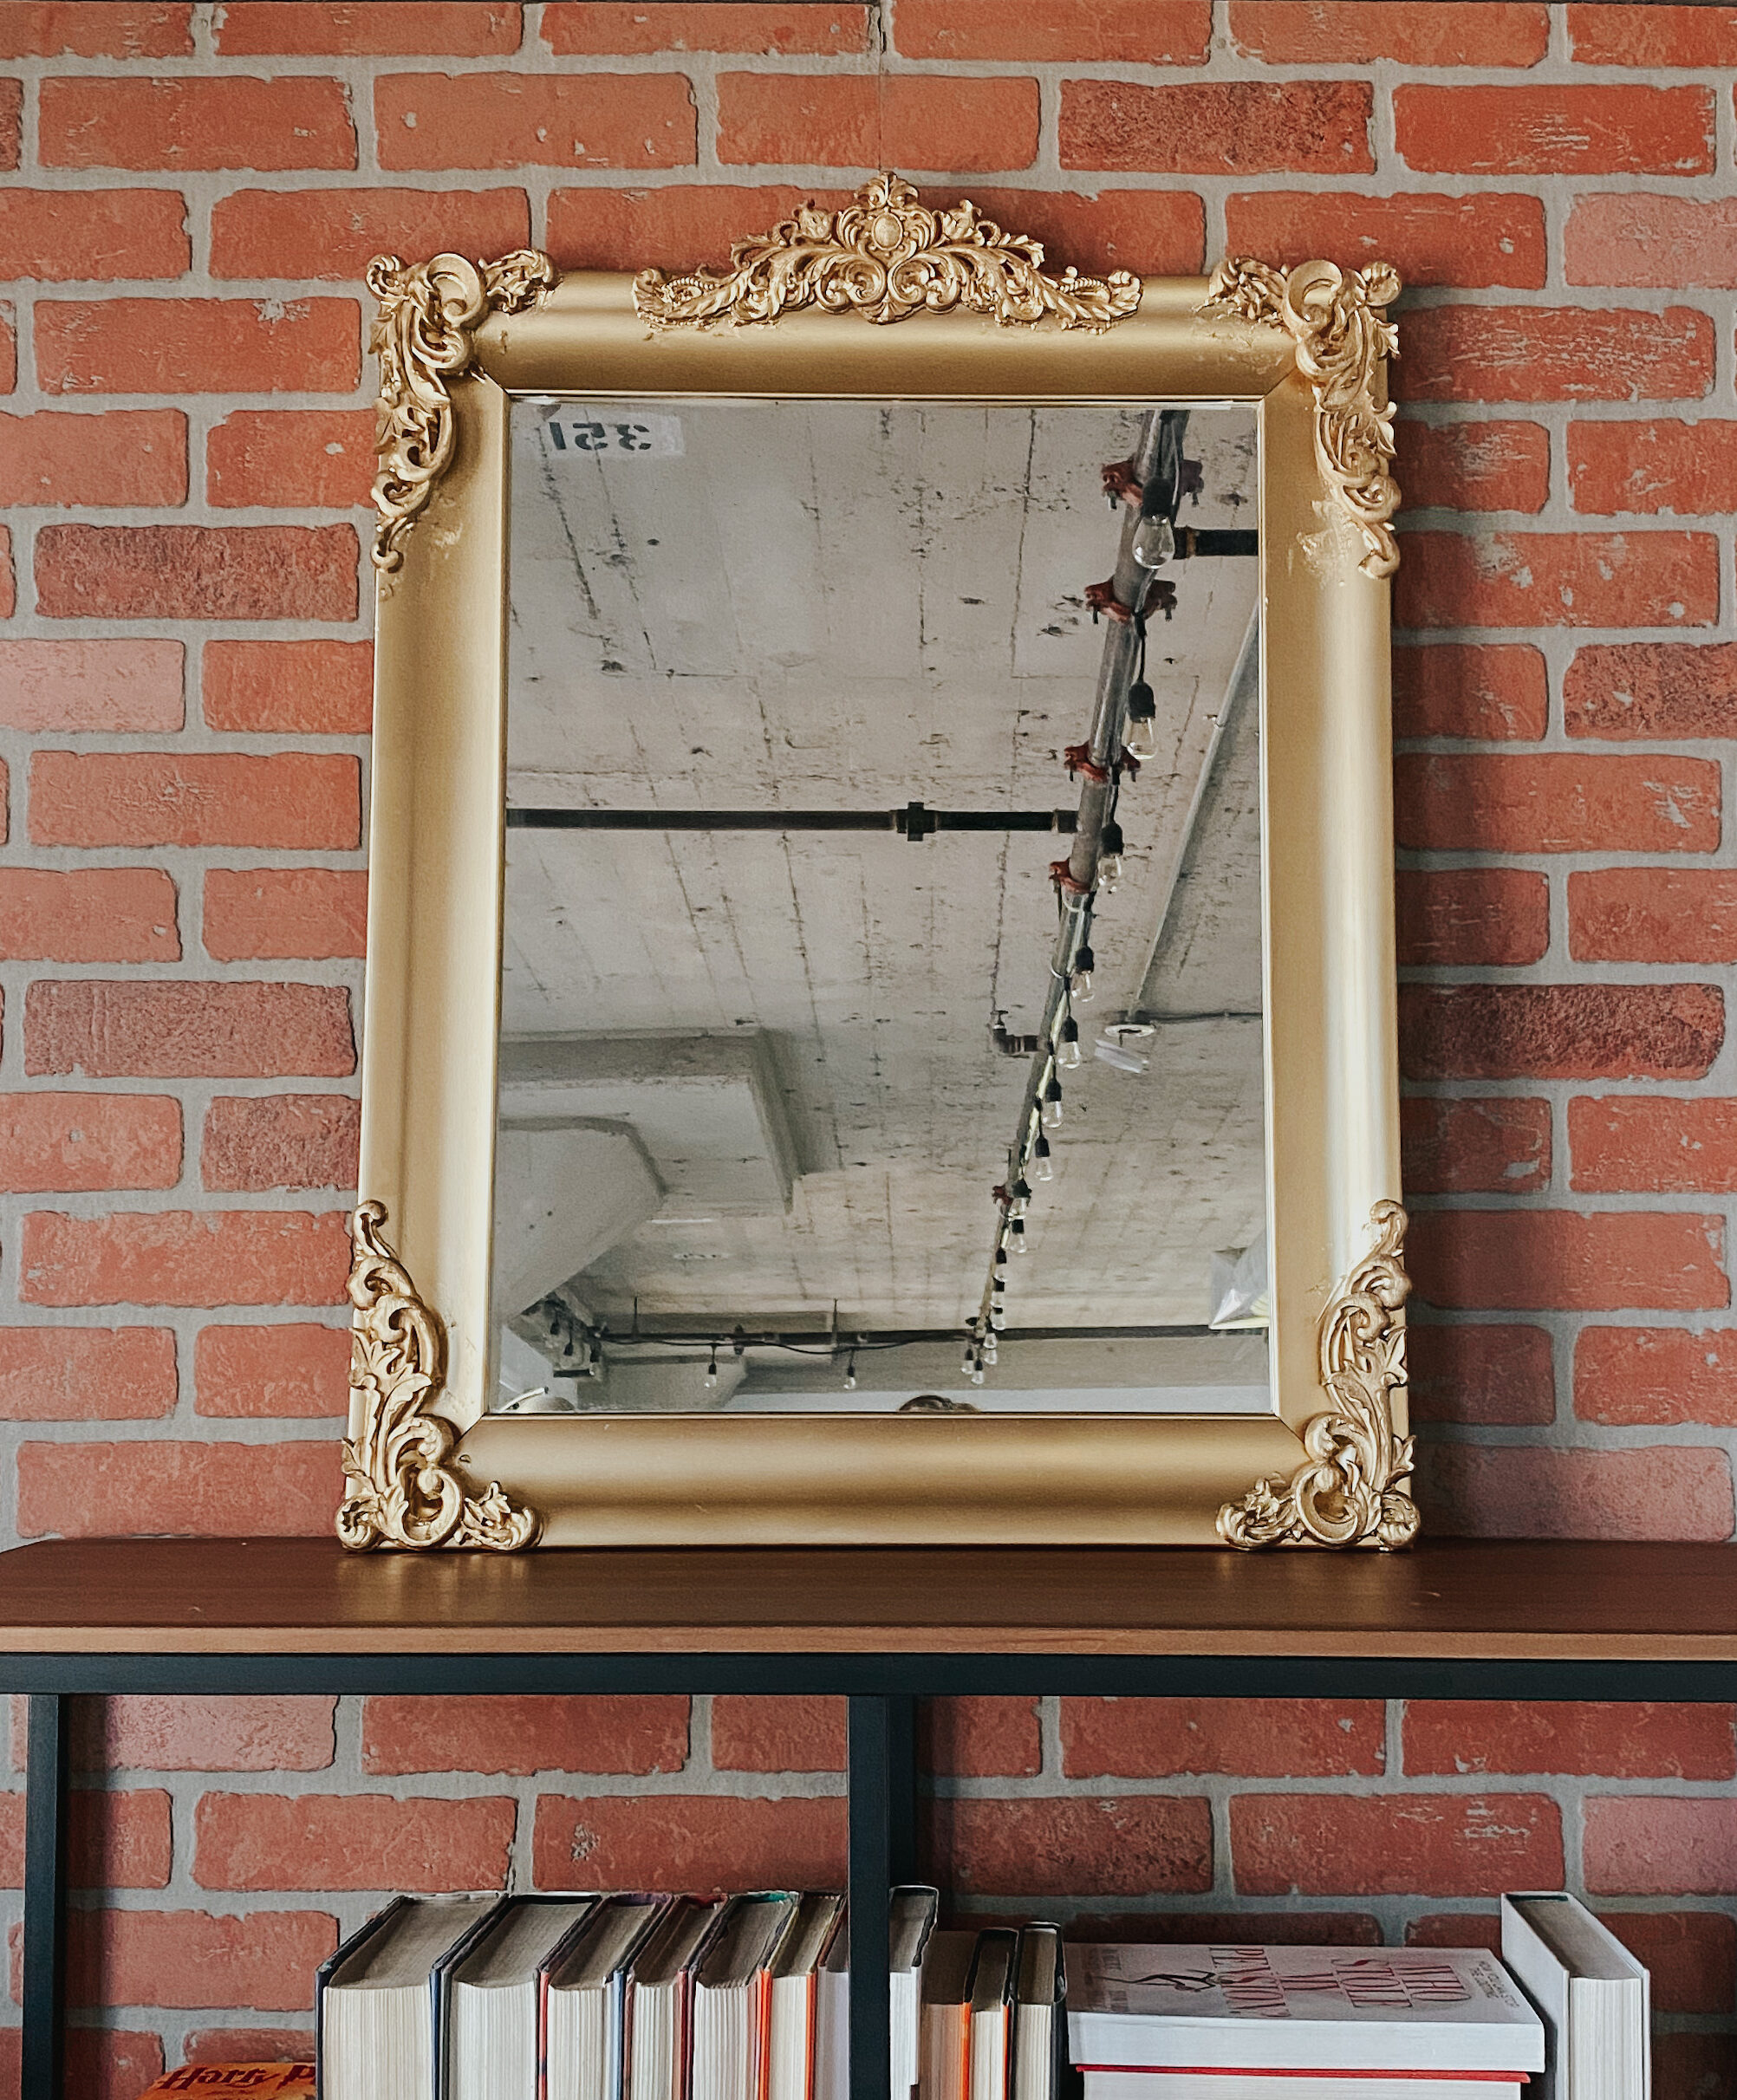
I actually had an old mirror tucked away for the last few years, wasting away in the corner, so I decided to do a little DIY project to see if I can replicate this iconic style frame in a budget-friendly way. I was able to complete this project in just a few hours and the best part is that it only cost me $50!
If you don’t already have a mirror you’d like to use, I recommend checking out your local thrift store and you’ll likely be able to find one for cheap. If you prefer the arched look of the Anthropologie mirror, don’t forget to check out the mirrors on display near the dressers. This type of mirror is typically paired with a dresser or cabinet since it’s designed to sit on top. The mirror I used was a basic rectangle but I think it still turned out spectacular!


DIY Anthropologie Mirror Tutorial (Step-By-Step)
Before we dive into the DIY mirror tutorial, these are the materials you’ll need:
Materials:
- Mirror (This is the one I had already)
- Gorilla Glue
- Painters Tape
- 6 Spring Clamps
- 4 Wooden Appliques (For Corners)
- 1 Wooden Applique (For The Top)
- Gold Metallic Spray Paint
- Towel Or Poster Board Paper
- Gloves
- Measuring Tape
Step 1: Clean the mirror
This step should be obvious, but, just make sure to thoroughly clean the mirror and the frame before you begin.
Step 2: Cover the mirror & tape the corners
Before you use any glue or spray paint, cover the mirror with a towel or some poster board and tape around the edges of the frame. This will keep the mirror protected from any of the materials so it stays nice and clean.
Step 3: Measure the top of the mirror & mark the center
Run a measuring tape across the top of the mirror and mark the center. This is where you’ll glue the center of the top applique.
Step 4: Glue the center applique to the top of the mirror
The Anthropologie mirror has a peak at the top, so make sure not to glue the top half to the frame. Instead, only glue the bottom third. Once it’s in place, use two of the clamps to hold down the sides. Use your measuring tape to make sure that both sides are even. It’s important to wear gloves and an apron during the gluing process because Gorilla glue WILL ruin your clothes and will be a b*tch to get off of your hands.
Step 5: Attach the four corner pieces
Using the same method as step 4, glue all four of the corner pieces. I let about 1/4 inch of the top pieces extend off the top of the mirror to add a little bit more shape to the mirror. This is completely optional but just make sure that you aren’t adding glue to any piece of the appliques if they aren’t going to be touching the actual frame.
Step 6: Dry for 2.5 hours doing touchups halfway through
This step is important. About 1 hour into the drying process, take a paper towel and clean up any glue that has dripped. Don’t forget to do this otherwise the glue will completely harden and you won’t be able to get it off! This allows for a super clean finished product. Once you’ve done the touch up, let it continue to dry for another 1.5 hours or so.
Step 7: Spray paint
Once the glue is completely dry, it’s time to spray paint! Make sure you have a blanket or tarp beneath the mirror before you spray paint, or complete this step in an area away from anything you want to get dirty. Spray the gold metallic spray paint all over the frame until all the edges and the details of the appliques are covered. Let it dry for approximately 1.5 hours.
Step 8: Remove the tape & mirror protector
Once the paint is completely dry, remove the protective cover and the tape. At this point your project is complete and you can either hang your mirror or display it wherever you’d like!


