
How to Make Homemade Ice Cream
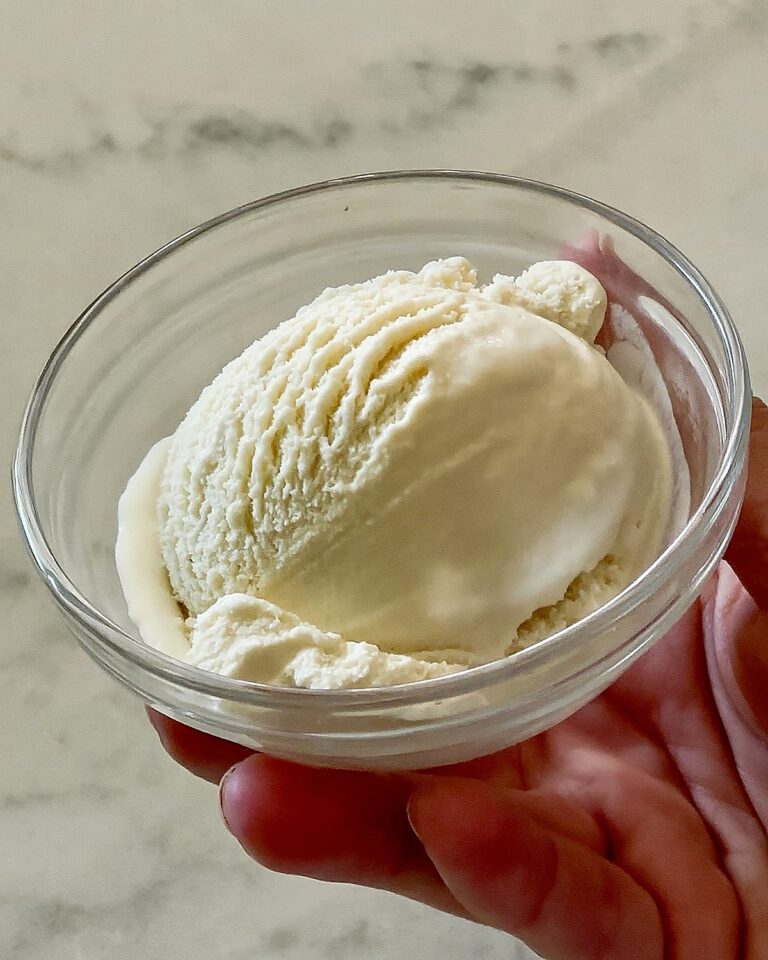
Make homemade ice cream with clean, simple ingredients and no refined sugar. The creamy custard science, every ice cream maker method, mix-ins, and easy swaps.
Homemaking
To make homemade pie from scratch, start with a chilled flaky crust made from flour, shortening, salt, an egg, and a splash of vinegar. Fill it with seasoned fruit, top with a second crust or crumb topping, glaze with butter or egg wash, and bake at 350°F for about an hour total — covering with foil once the crust turns golden.
Everybody loves pie. I haven’t met one person who doesn’t. But eating pie and baking pie are two completely different things — and baking is the part that scares people off. It can feel intimidating, especially if you’ve never made one before. Add too much of something or too little of something else and the whole thing falls apart.
I get it. Baking is more of a science than cooking is. There’s less room to wing it. But here’s the thing — once you learn how to make a homemade pie, you can bake almost anything. The skills transfer.
I’ve been baking pie since I was a kid, and after years of trial and error (mostly error, honestly), I’ve finally landed on the methods, recipes, and small habits that work every single time. This guide is everything I wish someone had handed me on day one. We’ll cover the ten tips that separate a good pie from a great one, the crumb topping I make on repeat, the decorative crust designs I come back to, the fruits I trust for filling, and three of my favorite pie recipes — a flaky crust, a classic apple, and a wild apple mountain berry crumb that I make every fall.
What we’ll cover
Before any recipe, these are the ten things I wish I’d known from the start. They’re the small habits and equipment choices that separate a pie that looks like a pie from a pie that actually tastes like one. Skim them once, come back to them before you start, and your first homemade pie will be miles better than mine was.
You don’t need a fully stocked baker’s kitchen, but a few specific tools make pie significantly easier. A pastry blender (or pastry cutter) is the one I’d never skip — it cuts cold shortening into the flour cleanly, which is what gives the crust its flake. A rolling pin matters too, but in a pinch I’ve used a wine bottle and it worked fine. Beyond that: dry and liquid measuring cups (they’re different on purpose), a pizza cutter for clean lattice strips, cookie cutters if you want to do decorative tops, a real pie pan with that slightly angled edge, a pastry server or thin cake knife for slicing without wrecking the pie, and a basting brush for the glaze. That’s it.
Most ovens lie a little. Mine runs about 15 degrees hot, and I didn’t know that for the first year I lived in this house. Buy a cheap oven thermometer and check yours before you commit to a recipe time. 350°F for 50 minutes to an hour is the sweet spot for most pies — hot enough to brown the crust without burning it, slow enough to actually cook the filling. If your oven runs hot, your crust will burn before the inside bubbles. Too cool, and the crust never browns.
This is the tip that changed everything for me. The crust browns long before the filling is fully cooked — usually around the 25 to 30 minute mark. The second the crust hits that perfect golden brown color, cover the whole pie loosely with a piece of aluminum foil and put it back in. The foil stops the crust from browning further while the filling finishes bubbling. Without this, you either pull the pie too early (cold filling) or leave it too long (burned crust). Foil solves both.
Fruit pies bubble over. They just do — especially the first couple times you make one and overestimate the filling. Put a rimmed cookie sheet on the rack below your pie. Any drippage hits the sheet, not the bottom of your oven, and you save yourself the hour of scrubbing burned sugar off the oven floor later. Ten seconds of prep, every time, no exceptions.
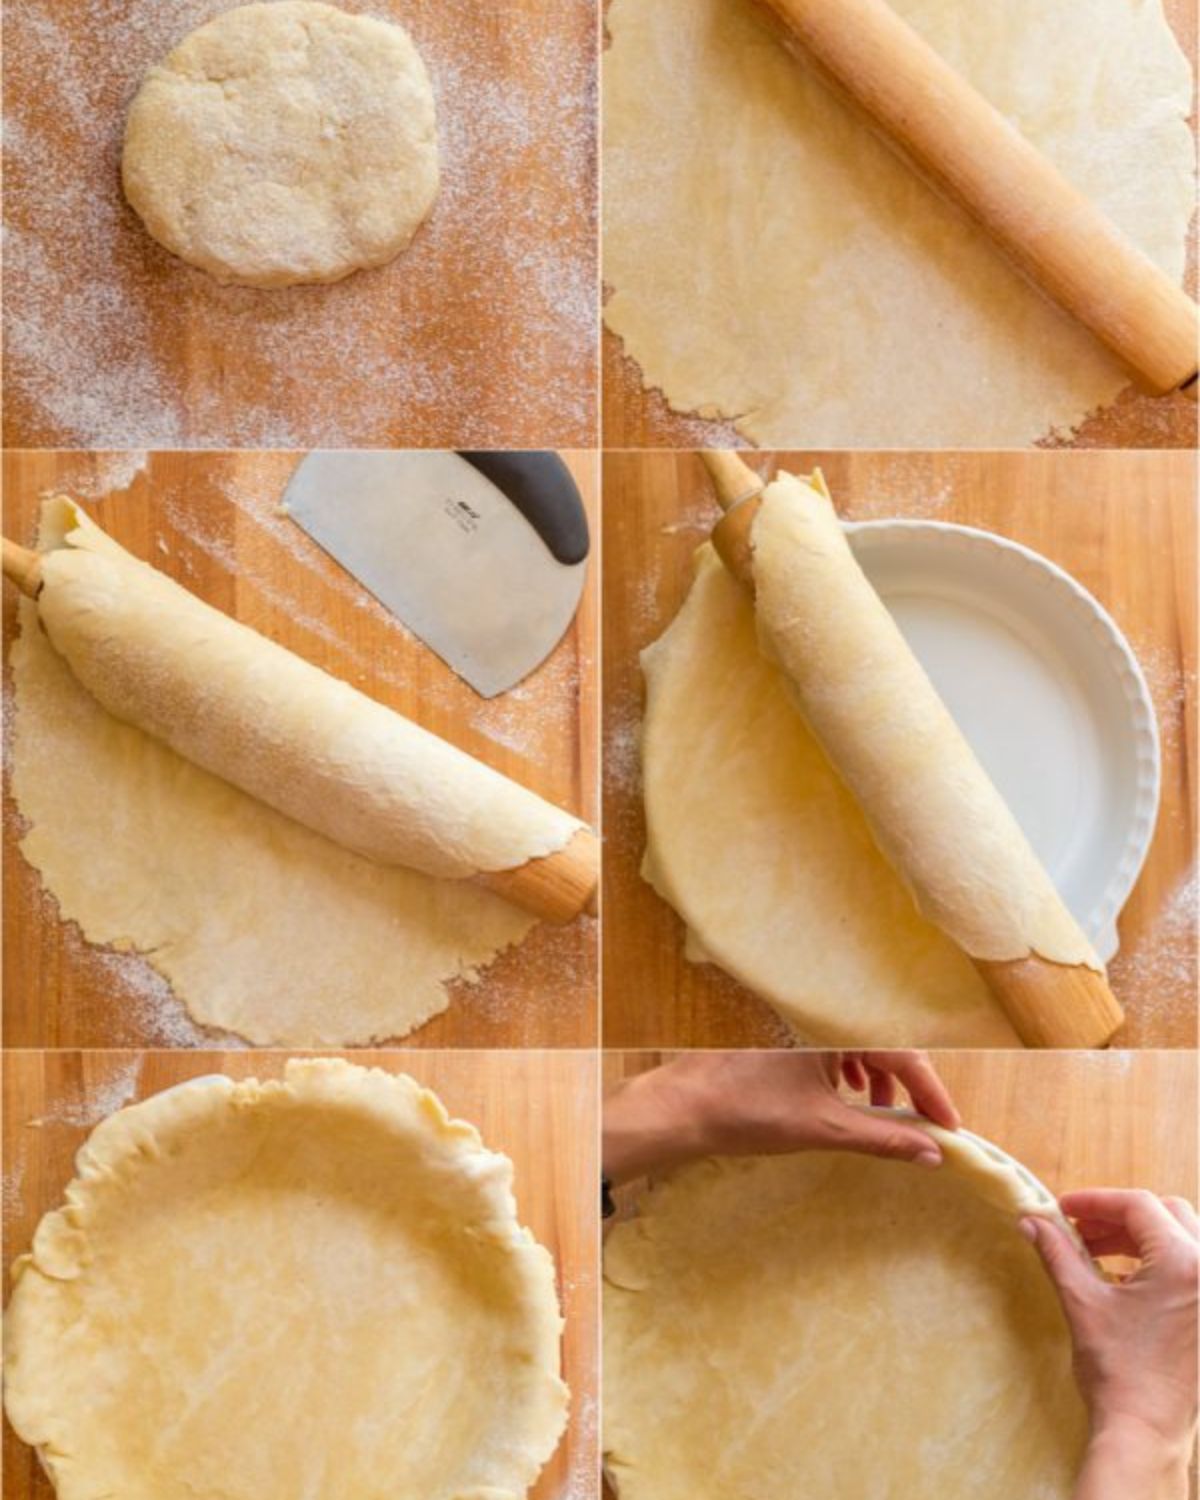
Once the dough comes together, wrap it in plastic and put it in the fridge for at least 20 minutes — 30 is better. Cold dough rolls cleaner, holds its shape better, and bakes flakier. The cold also lets the gluten relax, which means the crust won’t shrink in the oven. Use cold water and cold butter or shortening when you mix it, too. Cold is the whole secret to a flaky crust.
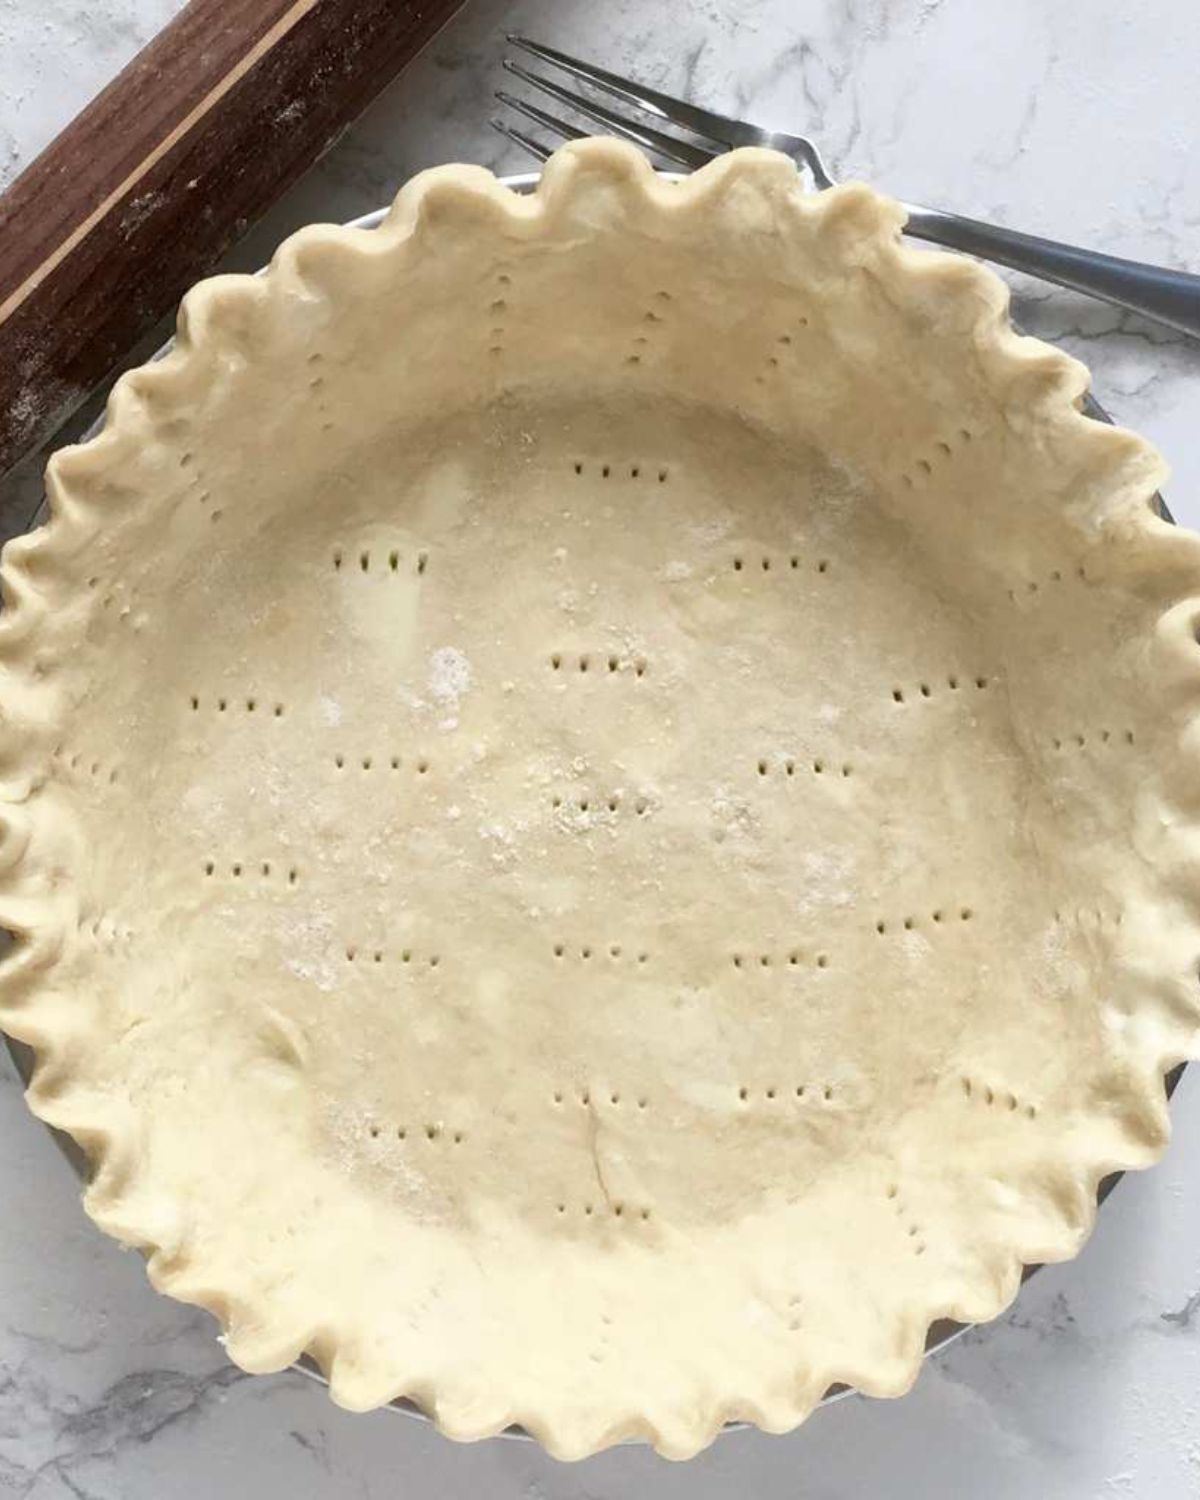
Once the bottom crust is in the pan, take a fork and prick a few holes across the bottom. This is called docking, and it lets steam escape during the bake. Without it, you get bubbles and pockets under the filling and the crust cooks unevenly. It takes ten seconds and it’s the difference between a flat, even bottom and a lumpy one.
If you want that golden, glossy finish, you need to glaze. Two options, both easy. Butter glaze: melt a tablespoon of butter in a saucepan and brush it across the top crust with a basting brush. Egg wash: mix one egg (or just the white) with a tablespoon of water and brush it on. The egg wash gives you more shine; the butter gives you more richness. I sprinkle a little granulated sugar on top right after for extra sparkle and a slight crunch.
I’ve wrecked more pie crusts at this step than any other. A few rules I’ve learned the hard way:
Sweet on its own gets boring fast. A tablespoon of lemon juice tossed with the fruit balances the sugar and keeps the fruit from oxidizing. Cinnamon and nutmeg add warmth without overpowering. These three together — citrus, cinnamon, nutmeg — are what makes a fruit pie taste like a pie and not like a bowl of sweetened fruit baked in a shell.
I’m firmly team small chunks for pie filling. Big slices of apple don’t cook all the way through before the crust burns, and you end up with crunchy filling and dark edges. Small pieces cook evenly, absorb more of the spice mixture, and hold together better when you slice. Aim for roughly half-inch cubes — bigger than diced, smaller than chopped.
Pie people fall into two camps: team crust and team crumble. I love both, but a crumb topping is honestly the easier of the two if you’re still working up confidence with rolling a second crust. Five ingredients, one bowl, no rolling required.
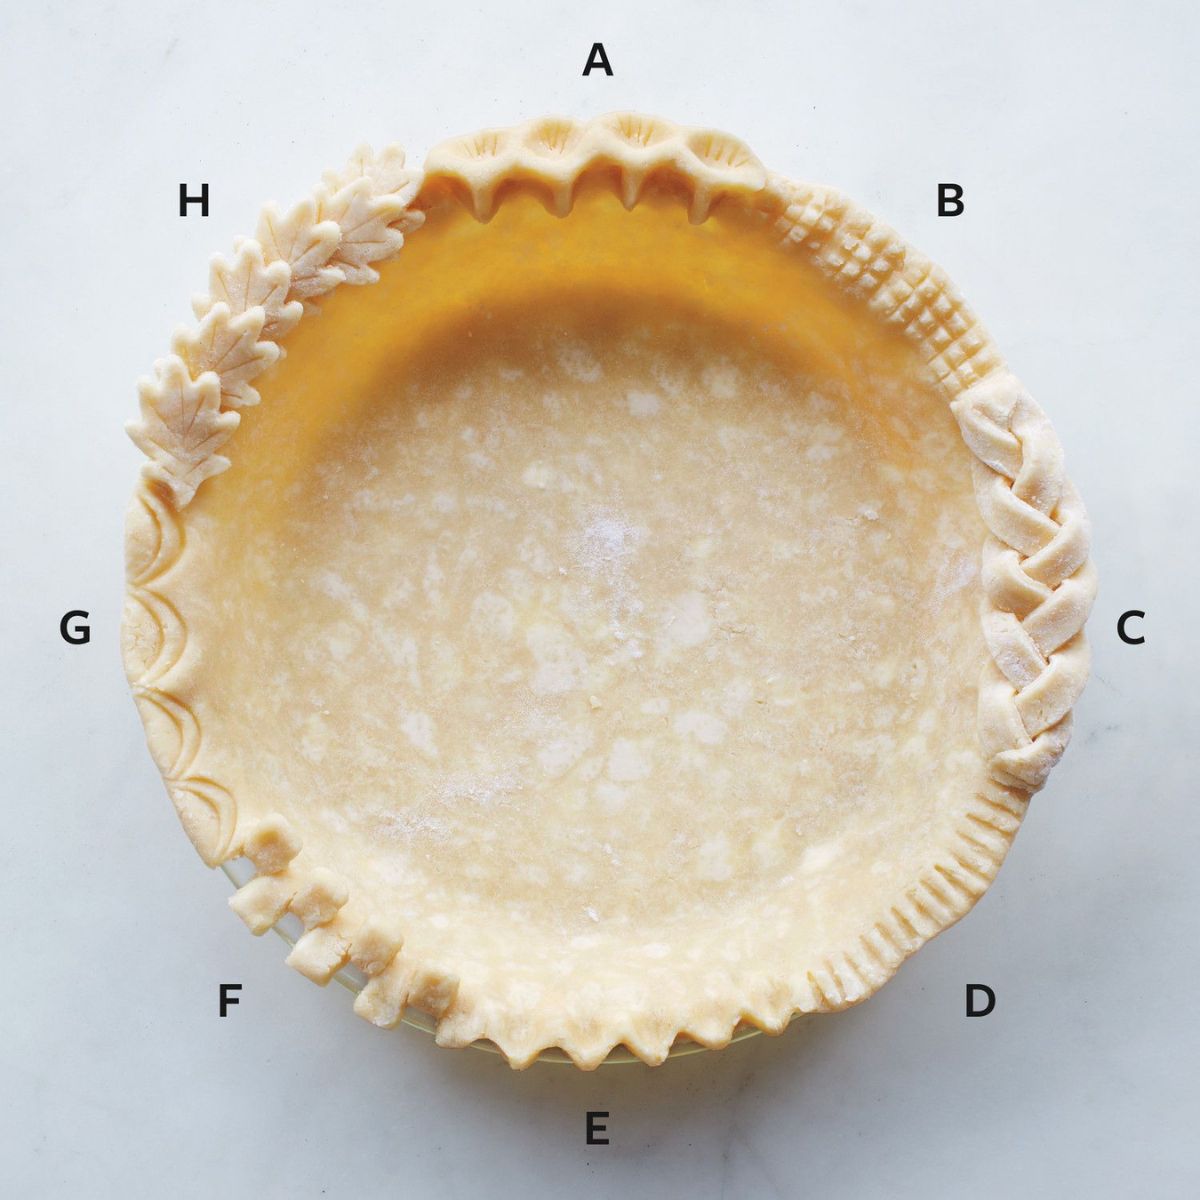
The top crust is where pies get to be a little artistic, and you don’t need to be a trained pastry chef to make one look beautiful. There’s no wrong way to do this — lattices, braids, cutouts, twists, simple crimps. Here are eight of my favorite finishes, all of them doable on a Tuesday night with no special tools.
People ask me this all the time. The honest answer: you can make pie out of almost any fruit. But the great pies — the ones people ask for the recipe afterward — come from fruits that balance sweetness with a little tartness, and that hold their shape when baked.
These are the fruits I reach for first, in roughly the order I use them:
Not every apple is a baking apple. The grocery store ones that taste best raw — like Pink Lady or Honeycrisp — actually do work for pie, but you also want a firmer baking apple in the mix. My go-to list:
My favorite trick: mix two varieties in one pie. A firm tart apple like Granny Smith with a sweeter, softer one like Honeycrisp gives you the texture and the flavor in one bite.
People assume homemade crust is hard. It’s not — it’s just particular. Most recipes call for butter, and butter is great for flavor, but it doesn’t give you that shatter-when-you-cut-it flake that I think a good pie crust deserves. I use vegetable shortening for that reason. Foolproof, every time, and the texture is unreal.
One recipe makes two shells, which is what you need for a covered pie or a lattice top. If you’re only using one shell for a crumb-topped pie, freeze the second — it keeps for months.

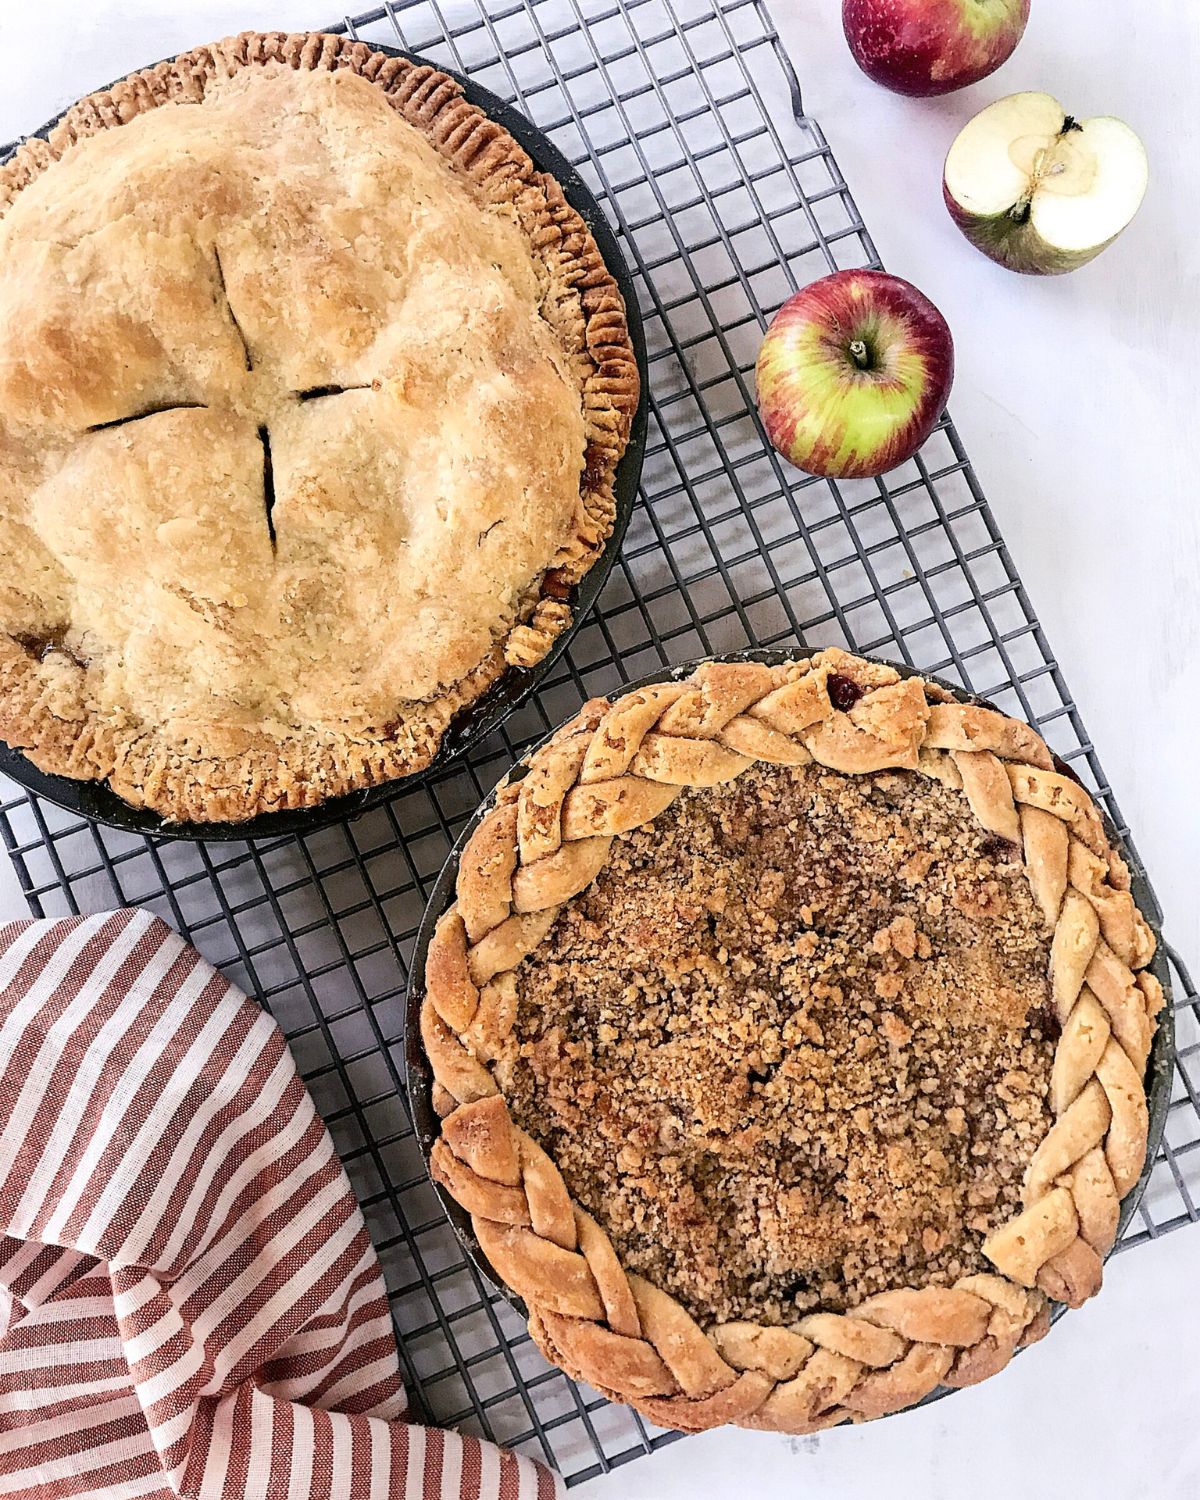
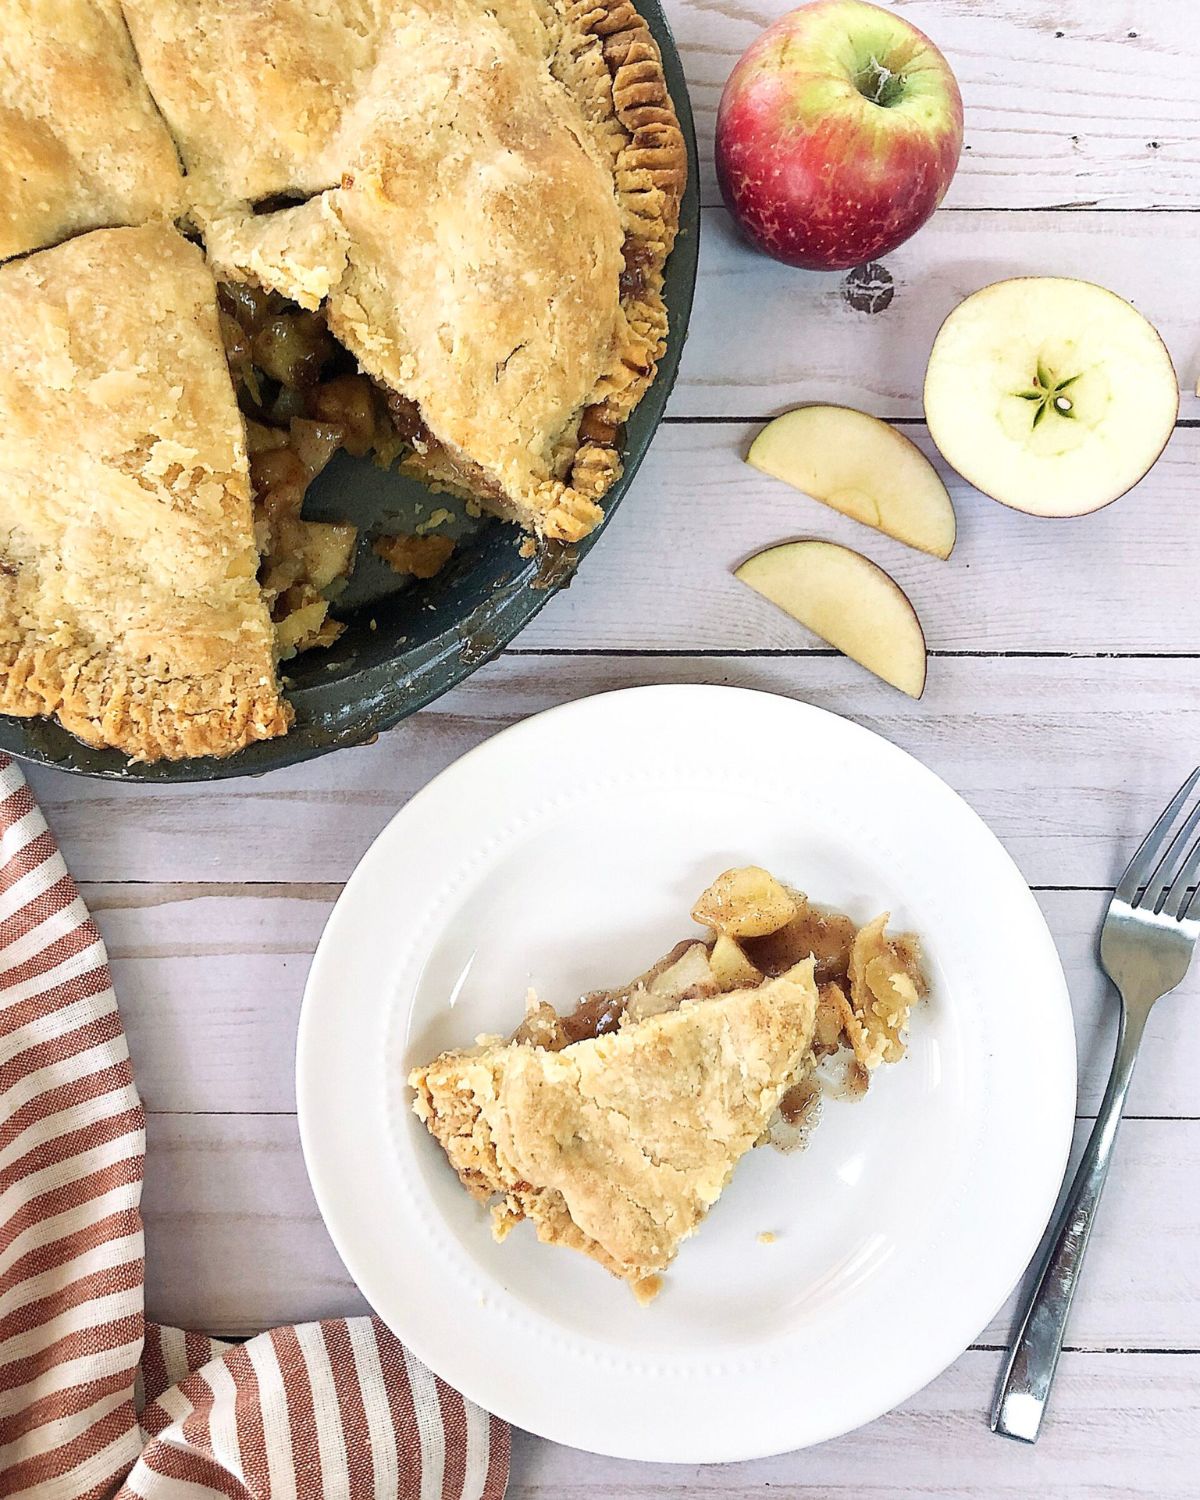
This is the one I make most. It’s straightforward, it’s the recipe my family asks for, and it’s the pie I’d recommend anyone start with. The combination of sweet and warm spice with a slight crispness in the apples is what makes it perfect — not too soft, not too sharp, holds together when you slice it.
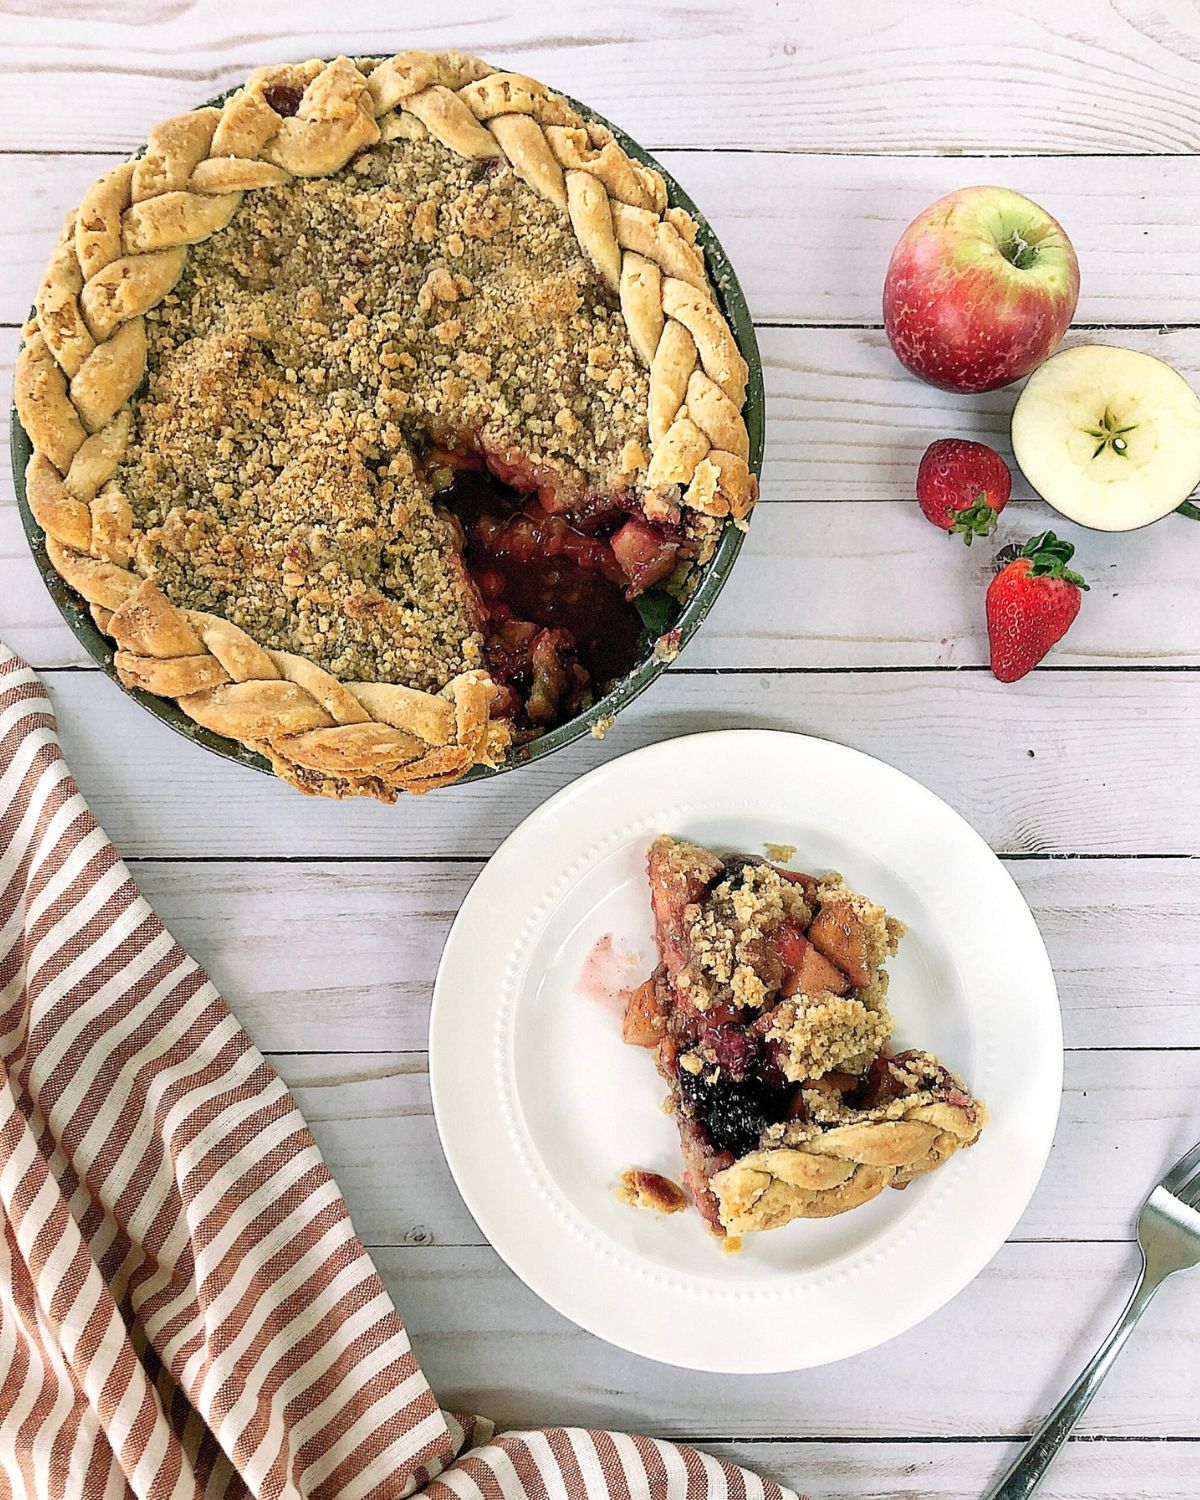
This one’s my personal favorite, and the pie I bring to almost every gathering — Thanksgiving, Fourth of July, dinner parties, you name it. It’s a little bit of everything: a mix of berries, cinnamon apples, and a brown sugar crumb topping. The combination sounds busy on paper but the flavors land beautifully together. People always ask for the recipe.
Apples are the most versatile pie fruit, but berries (boysenberry, blackberry, raspberry, blueberry, strawberry), peaches, and cherries all bake beautifully. The best pies balance sweetness with a little tartness and use fruit that holds its shape when baked. Mixing two varieties in one pie — like a tart Granny Smith with a sweet Honeycrisp — gives you the best of both.
350°F for about an hour total is the sweet spot for most fruit pies. Bake uncovered for the first 25 to 30 minutes until the crust hits golden brown, then cover loosely with foil and bake another 25 to 30 minutes until the filling bubbles. Lower temperatures leave the crust pale; higher temperatures burn it before the filling sets.
Flakiness comes from cold fat staying solid until it hits the oven, where it melts and creates pockets of steam. If your crust isn’t flaky, the most common culprits are warm ingredients (use cold water and cold shortening or butter), overworking the dough, or skipping the 30-minute chill before rolling. Using vegetable shortening instead of butter also gives a noticeably flakier texture.
Foil. The crust always finishes browning before the filling does — usually around 25 to 30 minutes in. The second the crust turns golden brown, cover the whole pie loosely with a piece of aluminum foil and finish baking. The foil stops further browning while the inside catches up.
Yes — at least 20 minutes, ideally 30. Chilling lets the gluten relax (so the crust doesn’t shrink in the oven), keeps the fat cold (so the crust stays flaky), and makes the dough less sticky and easier to roll. Skip this step and you’ll fight the dough the whole way through.
Absolutely. Pie dough keeps in the fridge for up to two days wrapped tightly in plastic, or up to three months in the freezer. Thaw frozen dough overnight in the fridge before rolling. One full recipe makes two shells, so I usually make a double batch and freeze the extras for the next pie I want to make.

Make homemade ice cream with clean, simple ingredients and no refined sugar. The creamy custard science, every ice cream maker method, mix-ins, and easy swaps.

If you’ve ever struggled with how to decorate your home, here are 5 simple and approachable interior design tips for beginners.

Here are my go-to tips for budgeting for a home renovation, what to budget for, and resources to stay on track!