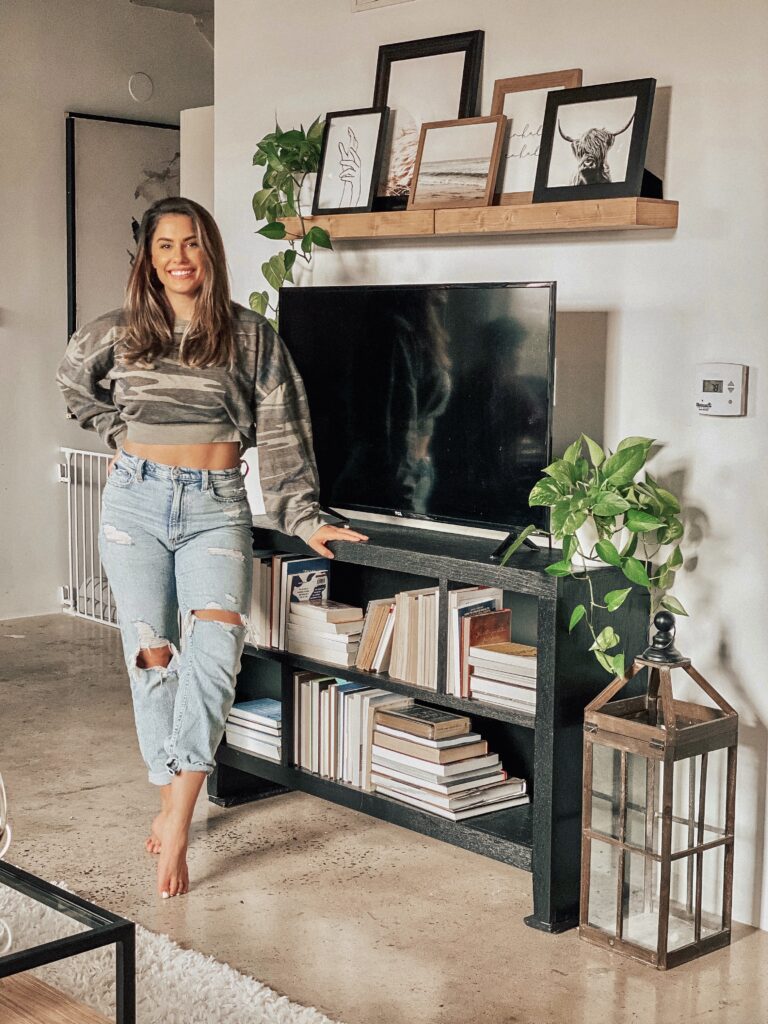
Wondering how to decorate wall behind tv stand? This easy TV stand makeover and gallery wall idea is exactly what you need to get that WOW factor on a budget!


I was having a really hard time trying to decide how to decorate wall behind TV stand. If your TV set up is like mine, your TV is sitting on top of the stand, not hung on the wall. And you know what I’m talking about when I say that there is a LOT of empty space that needs to be filled somehow. Sure, I could have hung the TV on the wall, but to be honest, I didn’t want to make the TV the focal point of the wall. So, instead I decided that I needed to add something to the wall to fill in all the empty space.
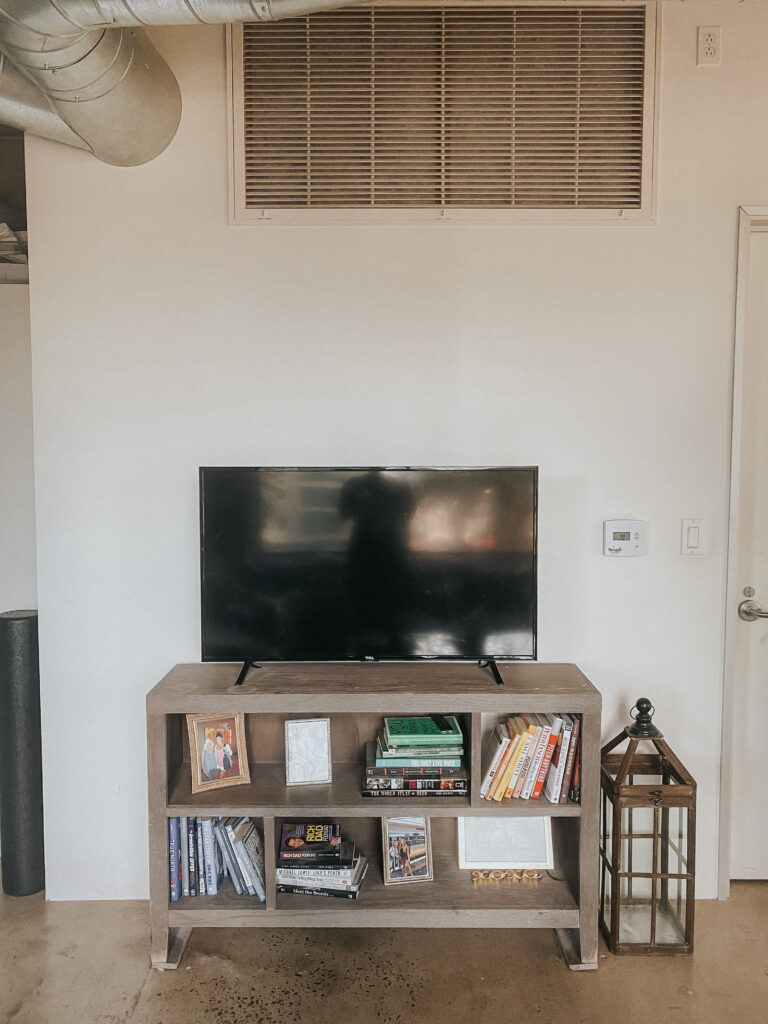
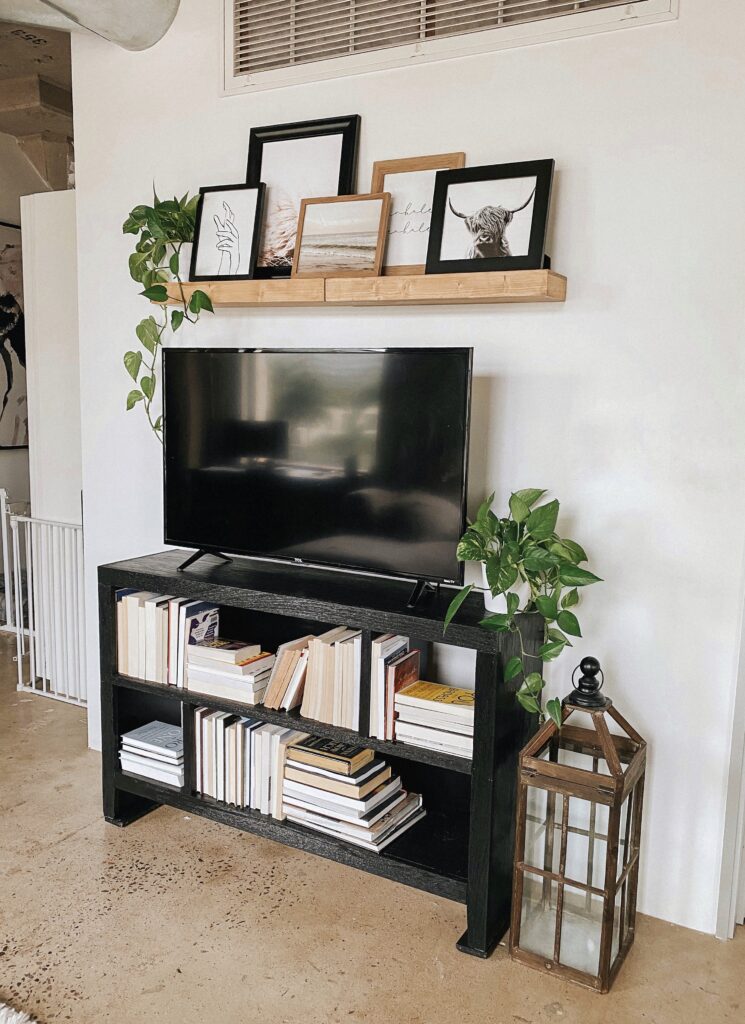
Today I’m sharing everything I did, and how to decorate wall behind TV stand. Here’s a little before and after before we dive in…
TV Stand Makeover
For me, the first step was to give the TV stand a whole new look. I found this TV stand Home Goods a few years ago but it doesn’t really “go” with any of our current living room decor. It’s still a great piece of furniture and I love the size of it, but I didn’t want to spend any more money on a new TV stand so a makeover was necessary. So, I decided to paint it black.
How to paint wood furniture
There are a few things to keep in mind when painting wood furniture. First, you need to sand it down and give it a good cleaning. Depending on the color you plan on using as well as the current finish of the piece of furniture will determine how much sanding will be needed.
- Step 1: Sand—I recommend using an orbital sander if you plan on staining your furniture or if you plan on painting it a light color. An electric sander will strip more of the top finish off to reveal the original wood color. I wanted to paint mine black, so stripping it completely down to the natural wood was a little excessive. So, I just used some leftover sandpaper from when we refinished the bed frame and did it by hand. If you’re stripping it down to the original wood, start with a low-grit sandpaper, like 60- or 120-grit to ensure the top coat is completely gone. I used 120-grit but sanded mine by hand. Definitely check out the bed frame blog for more precise instructions if you plan on using a wood stain instead of paint.
- Step 2: Clean—With any project that involves sanding and painting/staining, keeping a clean work space is crucial. You don’t want any of that excess sawdust to make its way into your top coat. I just wet an old wash cloth with water and wipe everything down.
- Step 3: Prime—Before painting, be sure to use a primer on your furniture. I used a paint and primer combo so I skipped this step. But if you’re using a paint without a primer, be sure to let the primer dry completely before moving to the next step.
- Step 4: Paint—Now, it’s time to paint. Like I said before, I used a paint and primer combo so I skipped Step 3. I used Behr Premium Plus Paint & Primer In One (Interior Semi-Gloss) in the color “Limousine Leather” (Linked below). I also used a basic paint brush that was recommended to me when I got the paint.
- Step 5: Paint again—You’ll likely need two coats of paint to avoid any streaks. So wait for your first coat to dry completely and then add a second coat.
How to decorate wall behind TV stand
Decorating the wall behind your TV stand can be tricky. One thing I’ve always loved is the idea of a gallery wall. The only problem is that I was not confident that I could make the picture frames super straight and I was worried that it would be too busy. The perfect compromise was to add a floating shelf and display a variety of framed photos that varied in size. I placed the frames in various directions and spread out the colors of the frames to create height, dimension, and an overall eye-catching aesthetic.
I also added some grown out devil’s ivy to one side of the shelf and another on the opposite side of the TV stand to help tie the shelfs and the TV stand together. The way the devil’s ivy drapes down brings your eyes to both the shelf and the TV in a very pleasing way.
To break up the color and avoid it being all black, I opted for a natural wood floating shelf (I actually hung two 24″ shelves side-by-side to make it appear like a longer shelf), and a mix between black and wood frames.
We actually use our TV stand as a functional book shelf (we have a few in the house), and needed it to continue to store our books. When I first placed all the books back on the shelf, I felt like the colors of the book bindings were distracting. So, I decided to flip all the books and store them with the bindings in the back. This way, there was a cohesive look and all the books are displayed in a neutral color. I know what you’re thinking… “How are you supposed to find the book you want to read?” Well, this bookshelf, as well as the tall book shelf next to Ryan’s desk, are actually all books that have been read already. We have a third book storage in the bedroom area we keep all the books we intend to read (with the bindings facing out).
I’ve linked all the decor for the shelving below.


